Easy St. Patrick’s Day Sensory Activities – DIY Calming Bottles And More Lucky Calming Crafts!
Sensory bottles, often called calming bottles, are a fantastic way to bring some holiday-themed fun into your classroom or home. Calming bottles are also a great tool to help with emotional regulation. They give children (and adults) something soothing to watch, leading to calming breaths that allow an individual to work on self and emotional regulation. For those diagnosed with ASD, calming crafts can be a quicker route to emotional regulation, and we encourage the parents of children with autism to try these DIY calming bottles for their children.
Two of our most calming bottles are also our easiest to create!
St. Patrick’s Day Sensory Activity 1: DIY Calming Bottle
For the first bottle, you’ll need:
Baby oil, green food coloring, water
Directions:
Pour about ¼ of the baby oil out.
Next, in a separate glass, mix green food coloring with water.
Last, add the green water to the baby oil bottle.
That’s it! Now enjoy the gorgeous green ocean in a bottle.
Pro tip: To prevent spills, we recommend hot gluing or super gluing the bottle’s lid closed.

St. Patrick’s Day Sensory Activity 2: Another St. Paddy’s Inspired DIY Calming Bottle
For the second type of soothing bottle, you’ll simply need:
Baby oil, green and yellow plastic jewels
Because the plastic jewels sink so quickly in water, we recommend adding them directly to the baby oil without any water. The baby oil will help slow the gems’ descent and create a relaxing show within the bottle. Again, remember to superglue or hot glue the lid closed.
If you have a few more materials lying around and a bit more time, we’ve got a few extra ideas for you! For the following three bottles, you’ll need a green hand or dish soap, water, glitter, gold plastic confetti, gold beads, green and clear glass pebbles, and any other festive materials you may enjoy. In addition, we included yellow and green counting disks and some silver stars to add to the magical feel.
This time we’re making three different types!
St. Patrick’s Day Sensory Activity 3: A Spread of Calming Bottles
For the first bottle, grab:
Green soap, green and clear glass pebbles, beads
Very similar to the baby oil and the plastic jewels, no other liquid is added to the green soap because of the density of the pebbles and beads. Pour out about a fourth of the soap and then simply drop the pebbles and beads into the bottle of soap. As usual, glue the lid shut and enjoy watching the soothing dance your St. Paddy’s treasures will perform for you.
For the next magical bottle, you’ll need:
Water, soap, glitter
For this calming bottle, pour out about half of the soap. Be sure to keep it somewhere safe in case you need to pour some back in to slow the sinking of your glitter. Next, fill the rest of the bottle with water and add a ridiculously fun amount of glitter to the bottle. Finally, glue the top shut and give your St. Patty’s bottle a shake! This type of bottle is also called a galaxy bottle because of the beautiful starry vibe it creates when swirled and shaken.
For the last bottle, you’ll need:
Green dish soap, water, fine gold glitter, gold confetti, gold beads, green and yellow counting disks
This one can be the most fun to make! With so many different types of materials in this bottle, we recommend pouring out about a third of the soap. You can always play around with the water-to-soap ratio. If you want your items to sink faster, add more water. If you want your materials to slow down, add more soap back in. Add all the precious goodies you want to add to this bottle, and then have fun figuring out the perfect combo of soap and water to make your treasures float to the bottom just right.
Speaking of sensory bottles, last month we had a lot of fun creating valentine’s day themed sensory bins. However, if you missed it or just wanted to continue the fun with a St. Patrick’s day twist, we’ve got a few additional materials you may wish to use this month.
St. Patrick’s Day Sensory Activity 4: St. Paddy’s Themed Sensory Bins
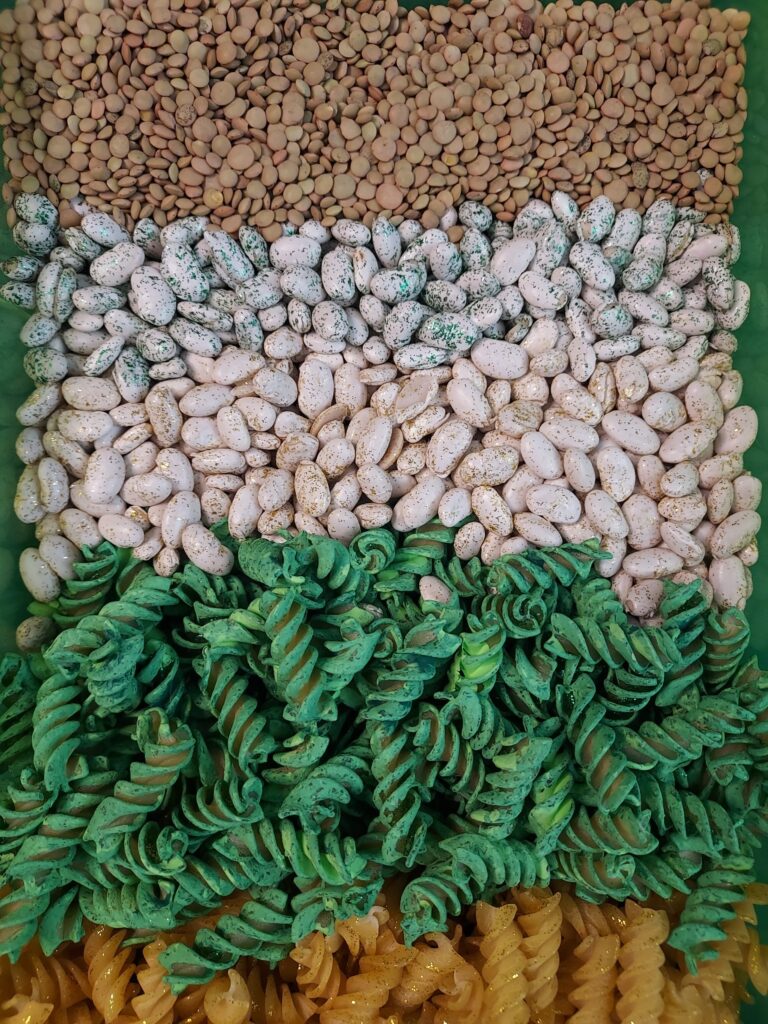
In honor of St. Patrick’s day, we’ve painted our uncooked pasta and beans green using a couple of different types of green paint! Simply pour your rice, noodles, or beans into a large Ziploc bag, squeeze in a generous amount of paint, zip the bag closed, and shake! Everything inside gets evenly coated, and there’s hardly any mess to clean up later. We usually just pour the rice out onto some parchment paper, flatten it out as best we can, and leave it to air dry for a bit.
Pro warning: Be mindful of when using different paints. Remember that all these foods go limp in water. If you’re using water-based paint and our ziplock back technique, be sure to remove the food from the bag the moment you are done shaking it. If you leave it to sit, the noodles, rice, or beans will begin to absorb the water in the paint and become soft.
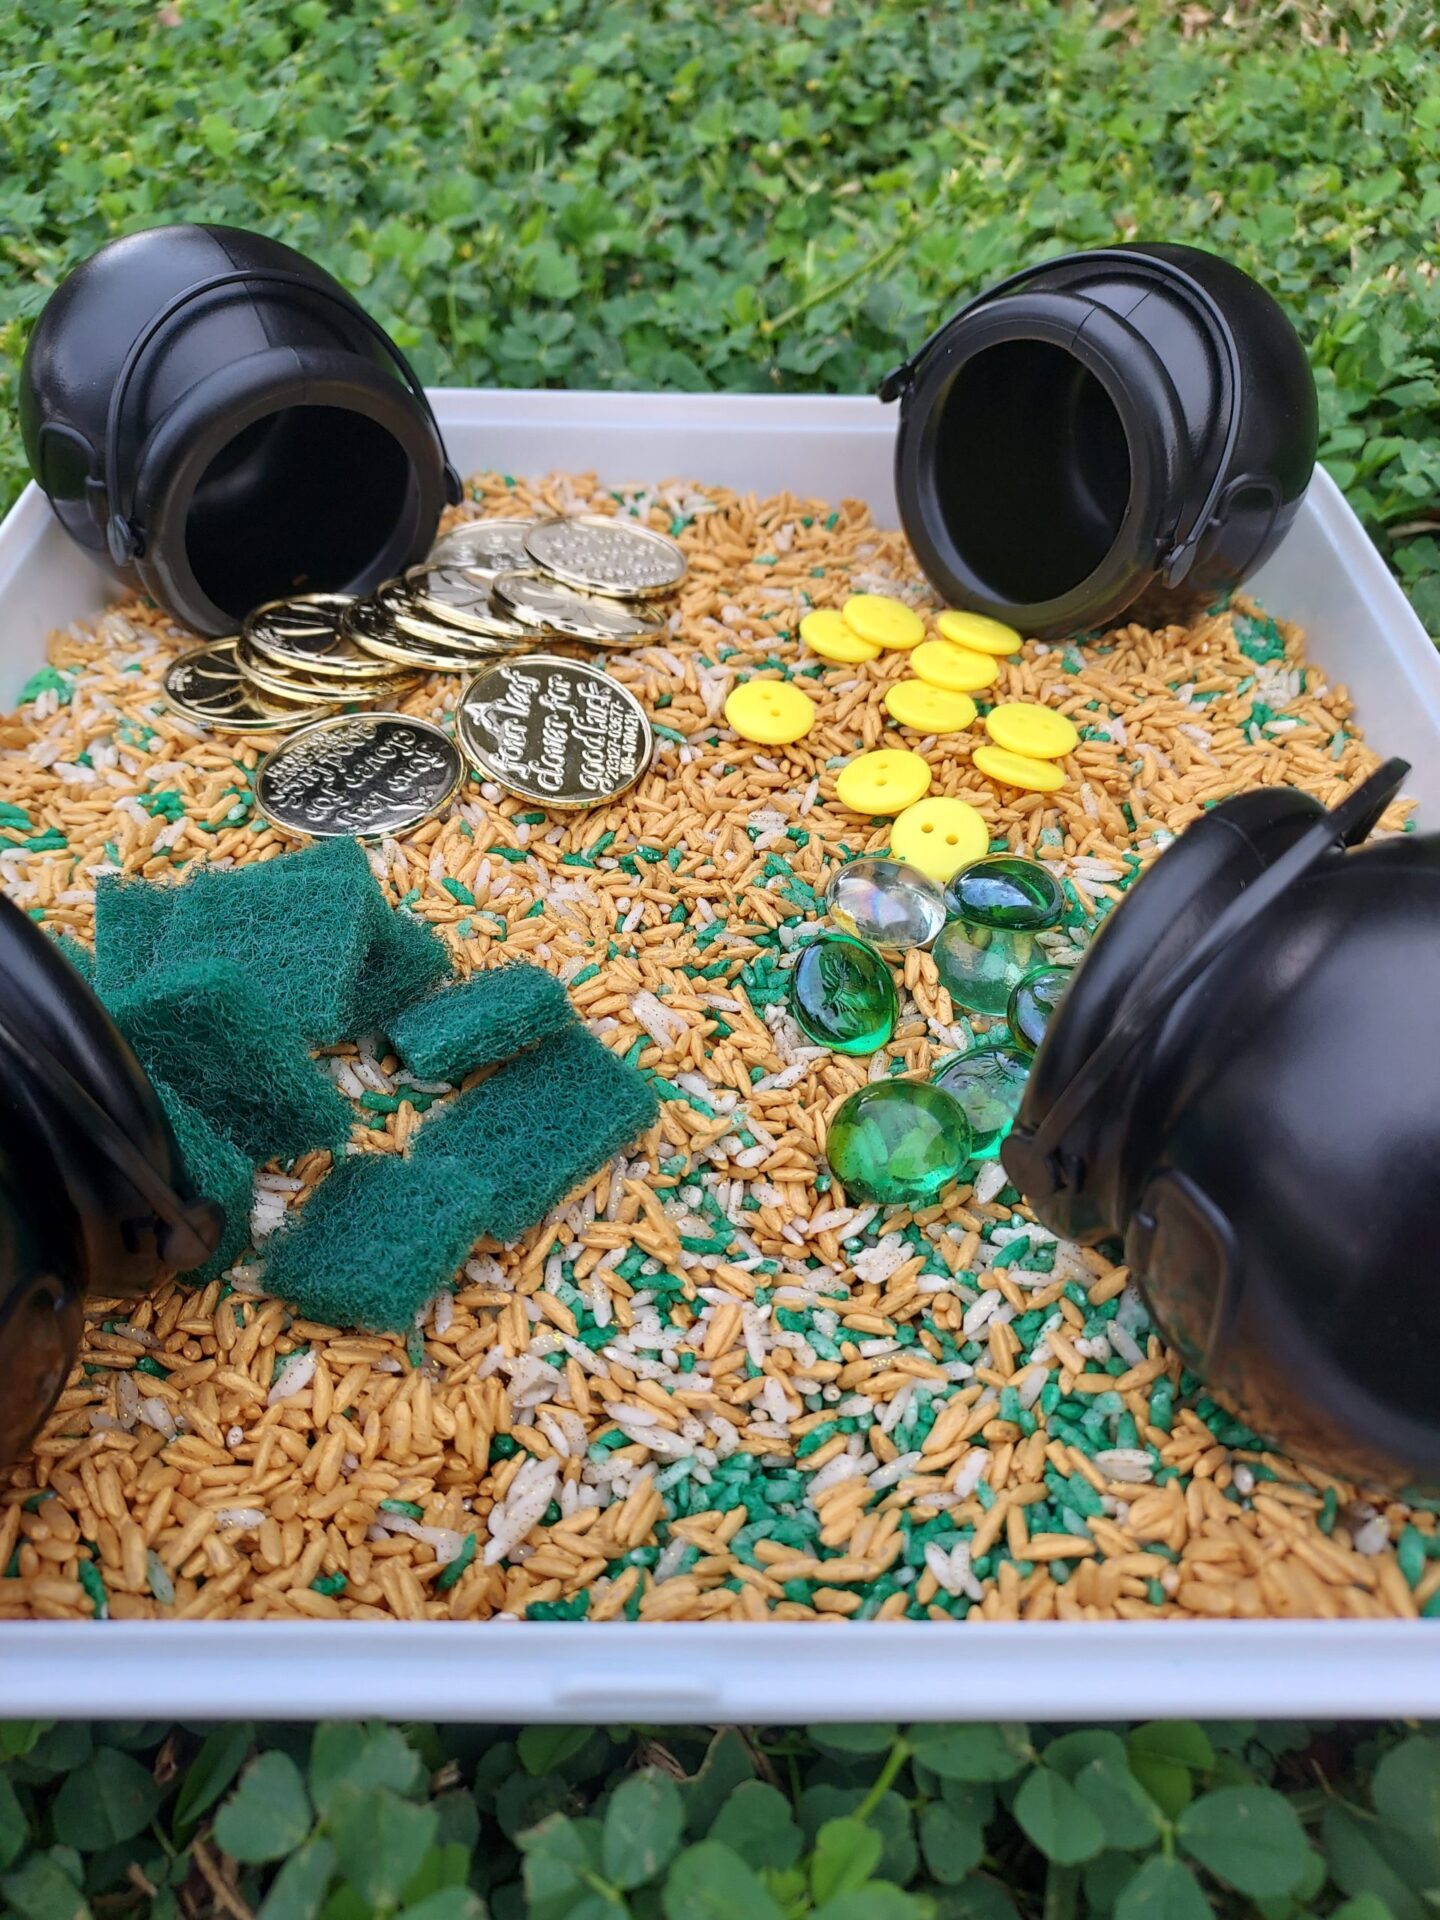
Choose whatever material you feel your little one will enjoy more and use it to create a sorting sensory bin. Hide little treasures like ridged gold coins, smooth glass pebbles, rough scrubbing sponges (cut into small squares), and counting discs for your little one to find and sort into different leprechaun pots. You can also write out how many of each item there is and have the whole family work together to find them all!
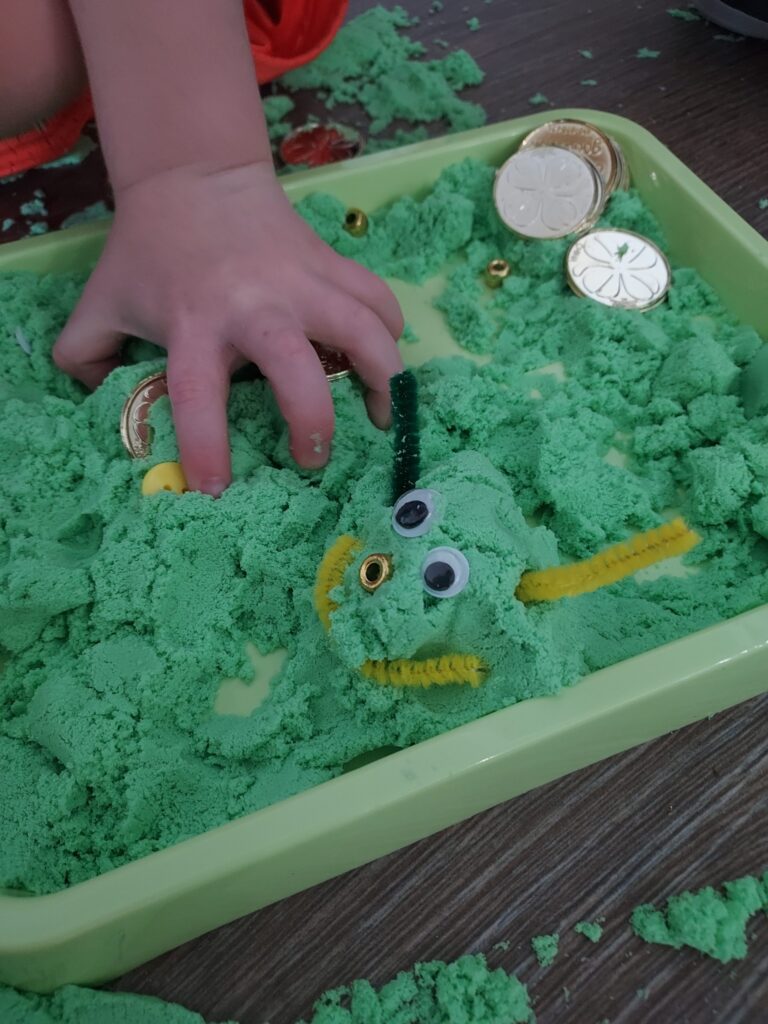
Our last fun and unique sensory activity for St. Patrick’s Day would be building a Leprechaun snowman. All you need is green magnetic sand and some fun pieces to use to decorate your snowman.
Pro Tip: Be sure your magnetic sand is on some kind of tray and not directly on the table to make clean up much more manageable!
May the luck of the Irish be with you! Happy DIYing!